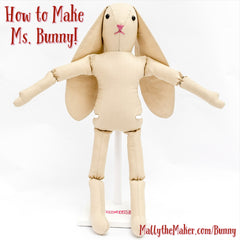
We've sewn a Ms. Bunny doll and now it's time to make her a dress! Learn how to sew a traditional doll dress with a lined bodice, lace on the sleeves, and a gathered skirt in this video tutorial:
Quick links to the pattern and supplies for Ms. Bunny:
|
|
|
|


Find all of the sewing tutorials for Ms. Bunny using the links below:
The first step to sewing this doll's dress is to cut out the pattern and arrange the pieces on your fabric. Make sure to check page 1 of the pattern for help arranging your pieces so you cut out the correct number of each shape.
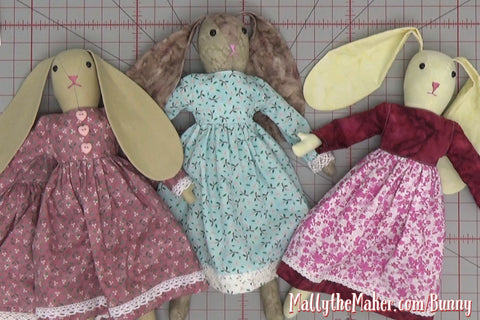
Feel free to play around with different fabric colors. I've experimented with different colors in the sleeves and skirt and the sky is the limit on combining fabrics in creative ways!
Step 1 - Sewing the Fully Lined Dress Bodice
The first step is to sew Ms. Bunny's dress bodice. Sew the bodice fronts to backs at the shoulder seams. Then stitch the two sets of bodices together.

I designed this doll dress pattern this way to make turning the neck edge, which is a tricky area, much easier. Simply stitch from the back, around the neck, and down the opposite back, then turn the entire piece right side out.
I prefer to clip my seam allowance down to 1/8-inch rather than filling it full of tiny clips. I just trim straight through the middle of the seam allowance and that reduces the bulk and allows the fabric to turn over easily.
After turning the bodice right side out, top stitch along the same path to finish the look and make the outer edge lay flat.
Step 2 - Inserting the Sleeves into the Doll's Dress
Sleeve insertion is about as much fun as a root canal usually! I spent a lot of time making sure Ms. Bunny's dress sleeves fit nicely and wouldn't make you crazy.
The first step is to stitch your lace and fold up the end of your sleeve and stitch the hem so the end is nicely finished. Also stitch around the curved end of the sleeve with a wide basting stitch (4.5 mm) around 1/8-inch from the edge of the fabric.
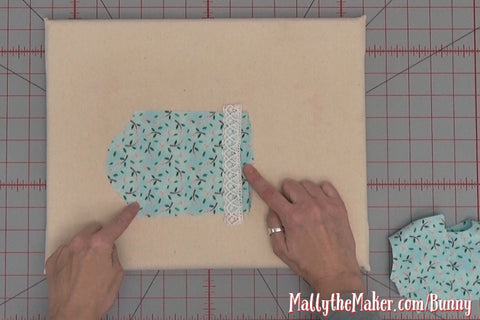
That basting stitch is the key to inserting the sleeves into the doll's dress easily. Make sure to leave yourself nice long thread tails so you can tug on this basting to help ease the sleeve into the arm curve.
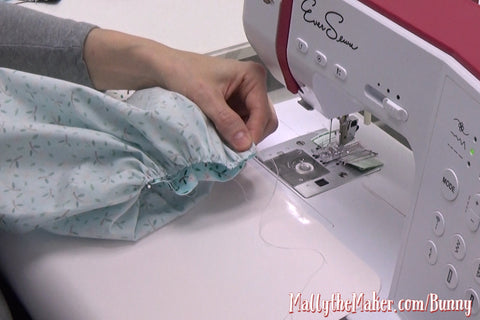
Set this up right by finding the midpoint of the sleeve and pin it to the shoulder seam of the bodice. Also pin the ends of the sleeve to the edges of the curve. Tug on ONE of the basting thread tails to begin gently gathering the sleeve up.
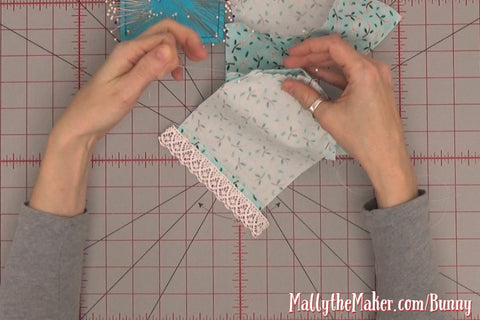
Continue gathering until the curve of the sleeve fits into the curve of the bodice. Do the same thing on the other side, then piece the fabrics together with a 1/4-inch seam allowance.
Finishing Seams As Desired
Many times for this dress you will see these words. My favorite way to finish seams is to zigzag as close to the line of stitching as I can. I lower the width of the zigzag to 2.5 mm and length to 1.5 mm to make a narrow, secure zigzag stitch.
Then I trim off the excess fabric that extends beyond the zigzag stitching.
Step 3 - Sewing the Upper Dress Bodice
The last step of sewing the dress bodice is to fold the dress sleeve and bodice right sides together. Stitch from the bottom edge to the lace end of the sleeves, being sure to backstitch on both ends.
Finish that seam as desired too and set the bodice aside while you work on the skirt.
Step 4 - Sewing the Skirt
First align your lace 1/8-inch from the bottom edge of the skirt rectangle and stitch in place. Next follow the instructions in the pattern to attach one side of the hem.
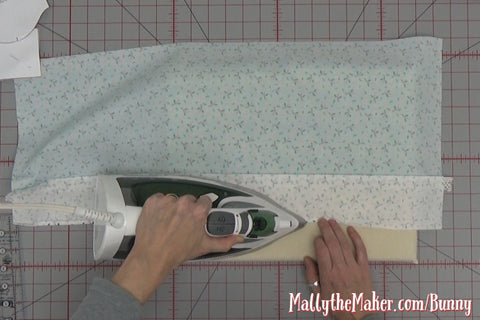
At your pressing board, press the bottom edge of the hem up 1/4-inch to the wrong side. Fold the hem in half and bring this folded edge up to cover the seam on the skirt.
Once the skirt hem is nicely finished, it's time to focus on the skirt back. First zigzag stitch or finish the short edges of the skirt as desired.
In the video, I ran into a bit of trouble because I used a wider zigzag stitch than usual. This caused my fabric to roll up a lot. Try not to do that and instead stitch a bit inside the edge of the fabric and with a normal, narrow zigzag stitch.
Now sew the back of the skirt up to the large dot. Press that seam allowance open and topstitch around the back skirt opening to create a nice, finished look.
Step 5 - Sew the Skirt and Bodice Together
The last step on the skirt is to run another line of basting stitch (4.5 mm length) 1/8-inch from the top edge. Leave nice long thread tails so you can tug on the thread to gather the skirt evenly.
Now pin the skirt to the bodice at their midpoints. Pull on the threads to gather the skirt until it fits the size of the bodice.
Stitch the two pieces together with a 1/4-inch seam, being careful to even out the gathers as you go. Once you finish the seam, press the seam allowance upwards towards the bodice and top stitch 1/8- inch from the edge to finish and flatten it nicely.
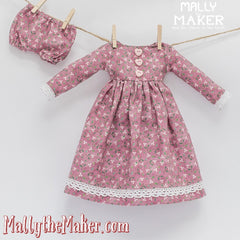
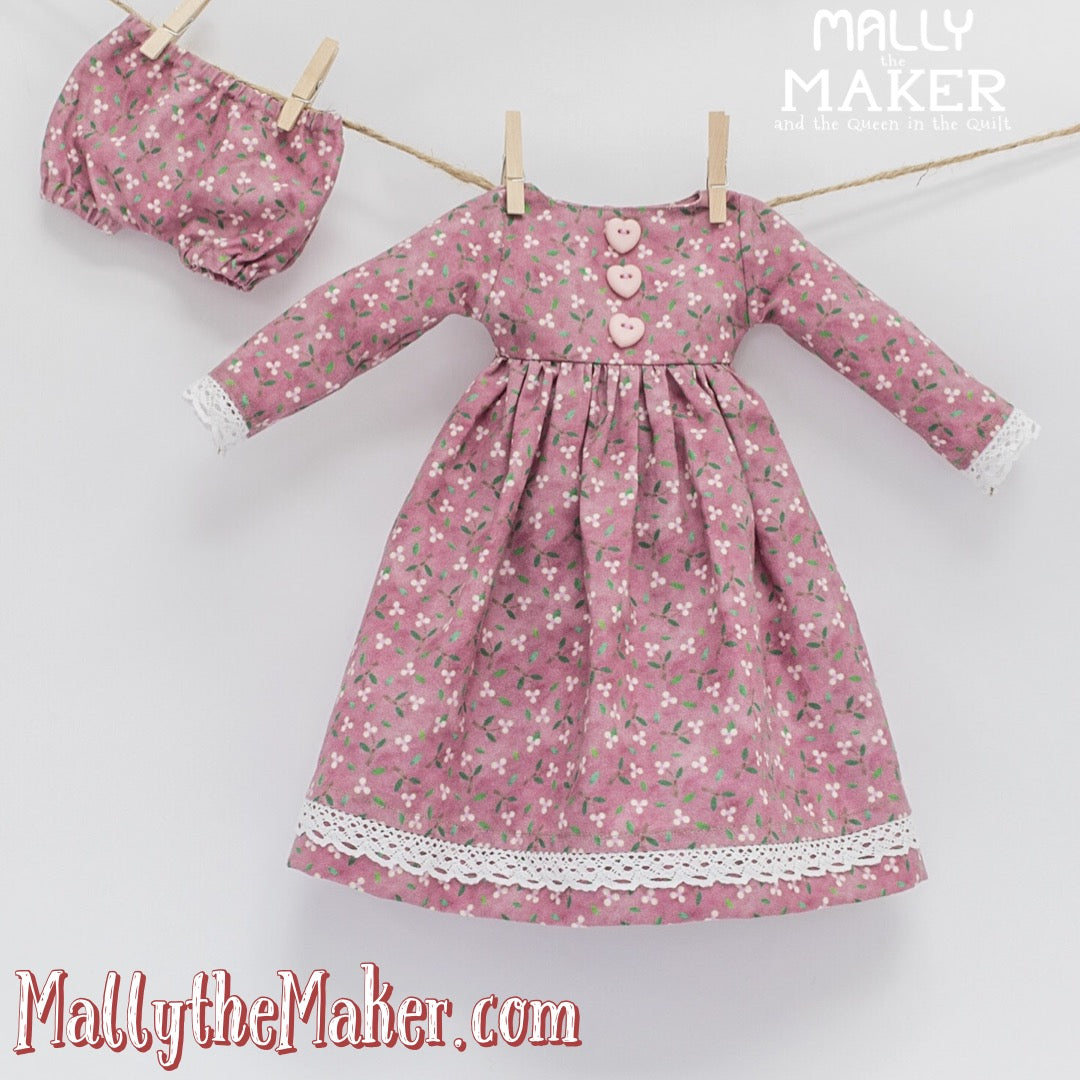
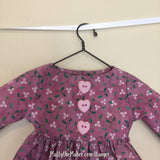
Your Ms. Bunny doll dress is complete!
Well, except for the back closure. How is Ms. Bunny going to manage if her dress keeps falling off? We need to attach some sort of closure to make her dress fits perfectly.
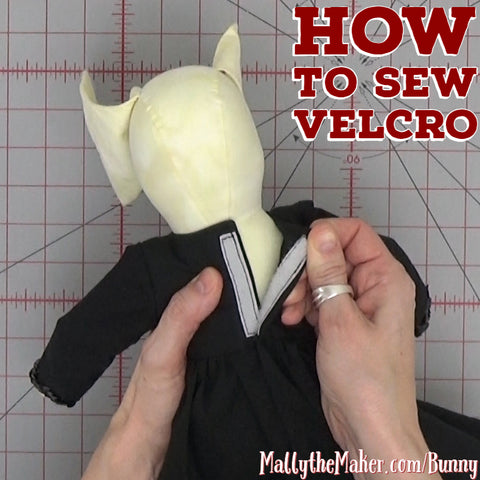
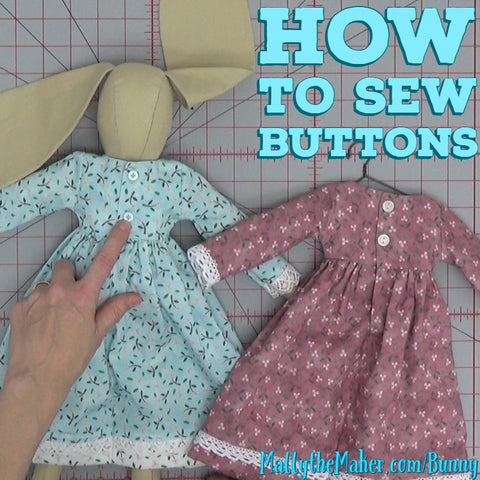
Three Ways to Sew the Back Closures
Let's now learn three different ways to finish the back of the dress with velcro, snaps, or buttons and buttonholes:
This doll dress is super cute when hung on a little hanger! Click Here to find a set of 3 dress hangers.
Honestly, velcro is the fastest and easiest option. I don't find that it pulls against most 100% woven cotton fabrics (quilters cotton). If my velcro had been black, it would have blended in completely with this black dress:
But the best looking closure on the dress back is probably the buttons and buttonholes. You just can't beat that nice look!
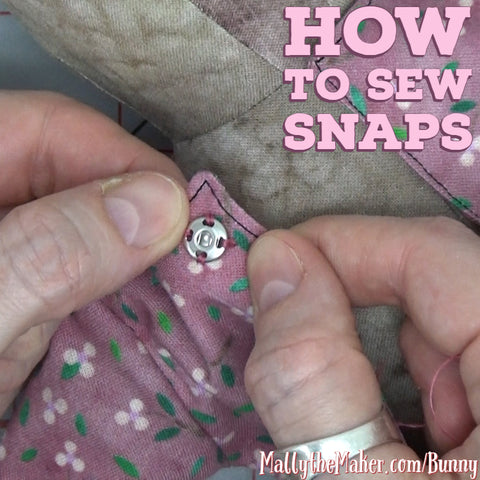
Snaps are also a great option if you like handwork. I find sewing three evenly spaced snaps to both sides works great.
No matter which way you finish the dress, you can be sure you have a garment that will last the test of time and make kids happy. I always hated it when dolls were made with clothes that couldn't be changed, or with buttons that didn't really work.
Even better, all of the techniques you've learned in this tutorial can absolutely be applied to real garment construction. This is exactly the same way you'd make a fully lined dress bodice for yourself (only a lot bigger!)
Yes, please make many Ms. Bunny dolls and dresses! Handmade dolls make terrific gifts and with practice this could be something to sell at your local art and craft boutique.
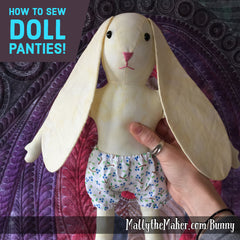
The Ms. Bunny sewing pattern comes with instructions and full sized templates for Ms. Bunny and her basic dress and panties. One last tutorial is coming soon to show you how to sew Ms. Bunny's panties!
Let's go sew,
Leah Day
Find more sewing tutorials to help you make your Ms. Bunny doll and dress her too!
|
|
|
|